+86-15726853660 / +86-18301913645
+86-15726853660 / +86-18301913645
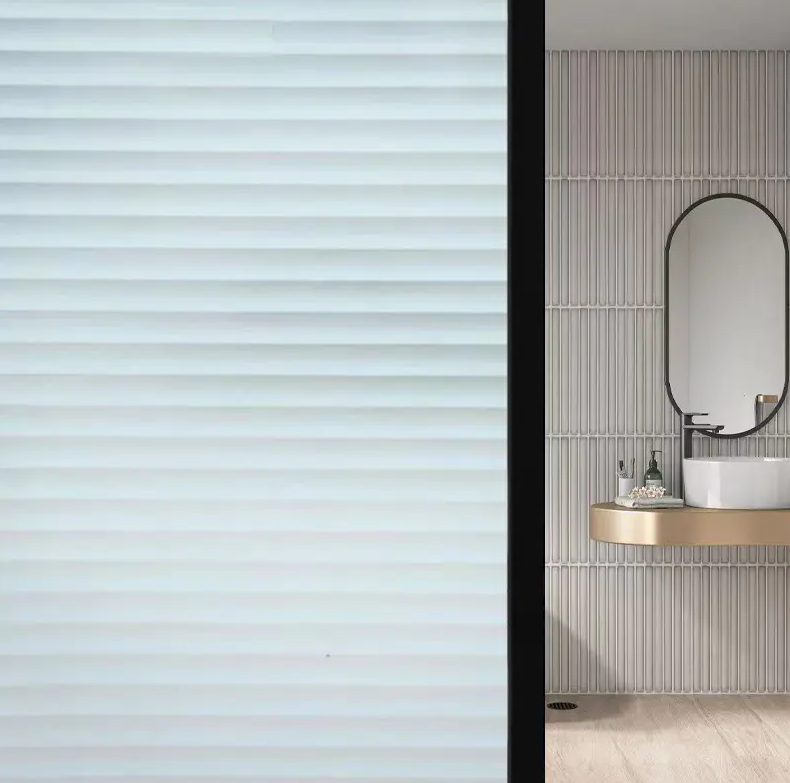
In homes, offices, and retail spaces, window door film cling has become a quiet but practical solution. It offers privacy, softens light, and adds visual interest without changing the structure of the glass. Many people are drawn to it because it does not rely on permanent adhesive. It can be adjusted, removed, and applied again with relative ease.
Yet the actual installation often feels more difficult than expected. The common issue is bubbling. Small pockets of trapped air or water can turn a smooth surface into something uneven. The film may still function, but it does not look right. This is where technique matters more than tools.
The process is not complicated in theory. In practice, it depends on patience, timing, and attention to small details. The steps below explore how people approach the task in real settings, where conditions are not always ideal and surfaces are not always perfect.
Bubbles underneath window film never show up by accident. They happen when anything stops the film from sticking fully and evenly to the glass. Below are the real‑world causes that commonly find to this issue:
Trapped air
This is the frequent reason for bubbles. If installers lay the film onto dry glass too fast, air gets caught between the film and the surface right away. Once sealed in place, these air pockets are hard to squeeze out later and turn into steady bubbles.
Excess leftover water
A thin layer of water normally helps slide and adjust the film during fitting. But too much moisture can collect into small hidden pockets. These liquid‑filled spaces look just like air bubbles on the surface and won't dry out evenly.
Tiny dust particles
This cause is often overlooked. Even fine dust or small specks stuck on the glass keep the film from lying completely flat. Each little particle pushes the film slightly upward, creating visible bumps and bubbles around it.
Unsuitable surface temperature
Glass that is too hot or too cold affects how the film adheres. Under temperatures, the film cannot settle evenly onto the surface. Weak adhesion creates small gaps, which slowly turn into bubbles over time.
Knowing these common triggers changes how people install window film. Rather than rushing through application, more focus goes into proper cleaning, surface prep, and steady laying work to avoid bubbles from the start.
Preparation is where problems are avoided rather than fixed.
The glass should be cleaned carefully. This is not just a quick wipe. Any residue left behind can interfere with the film. A clean cloth and a simple cleaning solution are usually enough. What matters is consistency.
Edges often need extra attention. Dirt tends to collect in corners, and these areas are easy to miss. When the film reaches these spots, trapped debris becomes visible.
After cleaning, the surface should be checked from different angles. Light reflection can reveal streaks or particles that are not obvious at glance.
Drying is another step that deserves time. The surface should not be dripping wet before application. A light, even layer of moisture works better than uneven patches.
Some installers prefer to clean the surface more than once. It may seem repetitive, but it reduces the chance of issues later.
The tools used are simple, yet their role is important.
A soft squeegee or a similar flat tool helps press the film onto the glass. It guides air and water outward. The pressure should be firm but controlled.
A spray bottle is often used to apply a thin layer of water. This allows the film to slide slightly before it settles into place. It also helps reduce immediate sticking, giving more control during positioning.
A clean cloth is useful for wiping away excess moisture. It also helps keep the working area tidy.
A cutting tool may be needed to trim edges. Precision matters here. Rough edges can affect the final appearance.
None of these tools are complex. The difference comes from how they are used rather than what they are.
Positioning sets the tone for the rest of the process.
The film is usually aligned from one side rather than placed all at once. This approach reduces the chance of trapping air across a wide area.
Light pressure is applied at the beginning. The goal is not to fix the film immediately but to hold it in place while adjustments are made.
If the film sticks too quickly, it becomes harder to reposition. This is why a slight layer of moisture is helpful. It allows movement without forcing it.
Hands should move slowly across the surface. Quick movements tend to trap air. A steady pace gives better control.
At this stage, the film may not look perfect. Small bubbles can still be present. What matters is that the overall alignment is correct.
Bubble removal is a gradual process. It does not happen in a single pass.
The squeegee is used to push air and water toward the edges. Movements often start from the center and move outward. This direction helps guide trapped elements away from the middle.
Pressure should be even. Too much force can distort the film. Too little may not move the bubbles effectively.
Some bubbles disappear quickly. Others require repeated passes. Patience is part of the process.
If a bubble remains, lifting a small section of the film and reapplying it can help. This should be done carefully to avoid introducing new air pockets.
The surface should be checked as the process continues. Light reflection can reveal areas that need more attention.
Many results depend on small habits rather than major steps.
Working in a calm environment helps. Strong airflow can carry dust onto the surface during application. A still space reduces this risk.
Lighting affects visibility. Good lighting makes it easier to spot bubbles early. Poor lighting can hide them until the process is finished.
Hand position also matters. Clean hands prevent transferring oils or particles onto the film. Even minor contamination can affect adhesion.
Timing plays a role as well. Rushing through the process often leads to uneven results. Taking short pauses can help maintain control.
Below is a simple overview of key steps and their focus:
| Step | What To Focus On | Common Issue To Avoid |
|---|---|---|
| Surface Cleaning | Remove dust and residue | Leaving small particles behind |
| Moisture Application | Keep a light, even layer | Using too much water |
| Film Positioning | Align gradually | Placing all at once |
| Squeegee Use | Apply steady pressure | Pressing unevenly |
| Bubble Removal | Move from center to edges | Ignoring small pockets |
| Edge Finishing | Trim and press carefully | Rough or lifted edges |
Edges often determine how neat the final result looks.
After the main surface is smooth, attention shifts to the borders. These areas may still hold small pockets of air or moisture.
The squeegee can be used again, this time with more focus on corners. Movements should follow the shape of the edge rather than cross it.
Trimming is done with care. The film should match the glass boundary without overlapping too much. Uneven cuts can draw attention even if the rest of the surface looks smooth.
Corners can be slightly more challenging. The film may need gentle adjustment to sit flat. Forcing it into place can create tension, which may to lifting later.
Once the film is in place, the work is not entirely finished.
The surface should be viewed from different angles. This helps identify any remaining bubbles or streaks. Some may only appear under certain lighting.
Edges should be pressed again if needed. This ensures that they remain secure as the film settles.
Moisture trapped under the film may take some time to dry. During this period, the appearance can change slightly. This is normal, but large pockets should not be ignored.
A final wipe removes excess water from the surface. This step improves clarity and presentation.
Applying window film cling becomes easier over time. The process feels less mechanical and more intuitive.
Early attempts may include small imperfections. With experience, hands move more steadily. Decisions are made with more confidence.
People begin to recognize how much pressure to apply, how much moisture to use, and how to respond when something does not go as planned.
Each surface offers a slightly different experience. Glass size, lighting, and environment all influence the process. Over time, these variations become easier to manage.
In many ways, the task shifts from following steps to understanding behavior. The film, the glass, and the tools begin to work together rather than against each other.
Contact us





+86-15726853660 / +86-18301913645
No. 99, Jinxiang Road, Hubin New District, Suyu, Suqian City, Jiangsu Province, China

Decorative Film Materials

 English
 Français
 Español
 عربى
عربى
 русский